Merging records
Merging is a powerful tool in HERITRACE for cleaning up your data by consolidating duplicate records. This guide explains the entire process.
Understanding similar resources
Section titled “Understanding similar resources”HERITRACE automatically identifies potential duplicates by comparing entities based on configured similarity properties. These properties define which fields are used to detect matches (such as titles, identifiers, or names) and support flexible OR/AND logic.
For detailed information about how to configure similarity properties and customize duplicate detection logic, see the Similarity properties for duplicate detection section in the display rules configuration guide.
Step 1: Identify and initiate the merge
Section titled “Step 1: Identify and initiate the merge”To begin a merge, you first need to navigate to the page of the entity you want to keep.
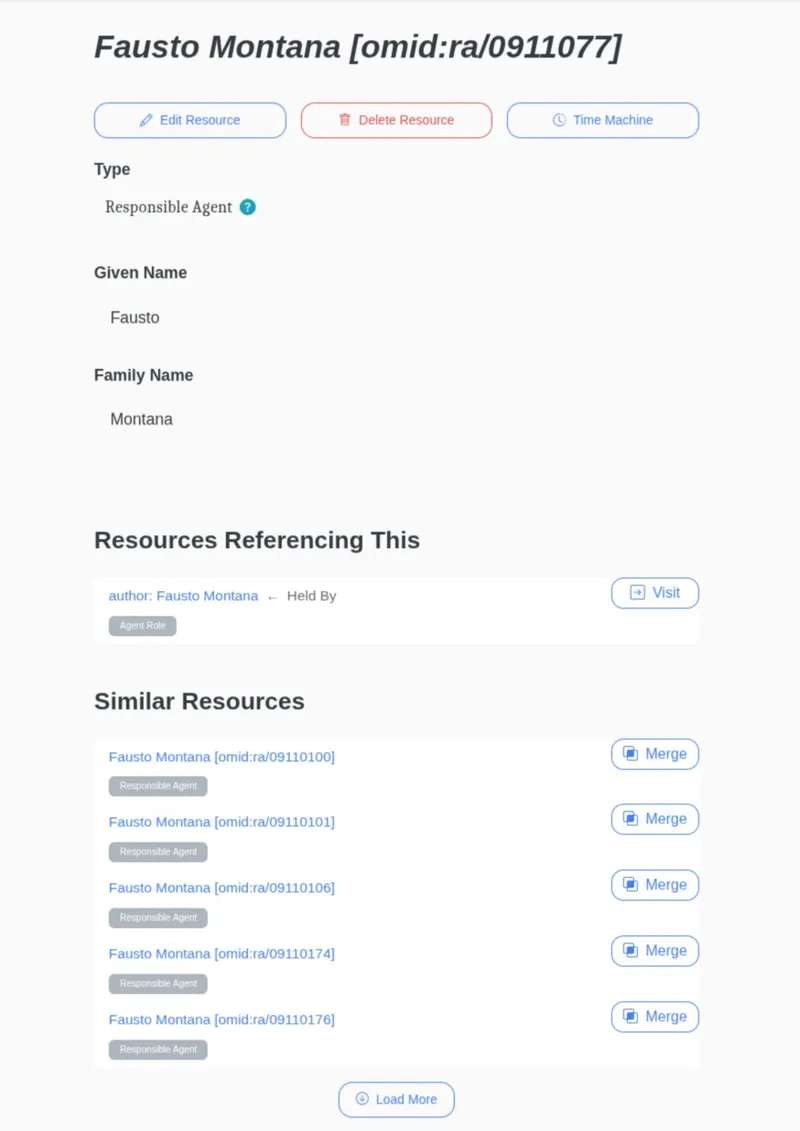
- From that entity’s page, scroll down to the “Similar Resources” section at the bottom. This area lists other records that HERITRACE has identified as potential duplicates.
- Review the list and find the record you want to merge into the current one.
- Click the “Merge” button next to that record.
Step 2: Confirm the merge
Section titled “Step 2: Confirm the merge”After initiating the merge, you will be taken to a confirmation screen that summarizes the action.
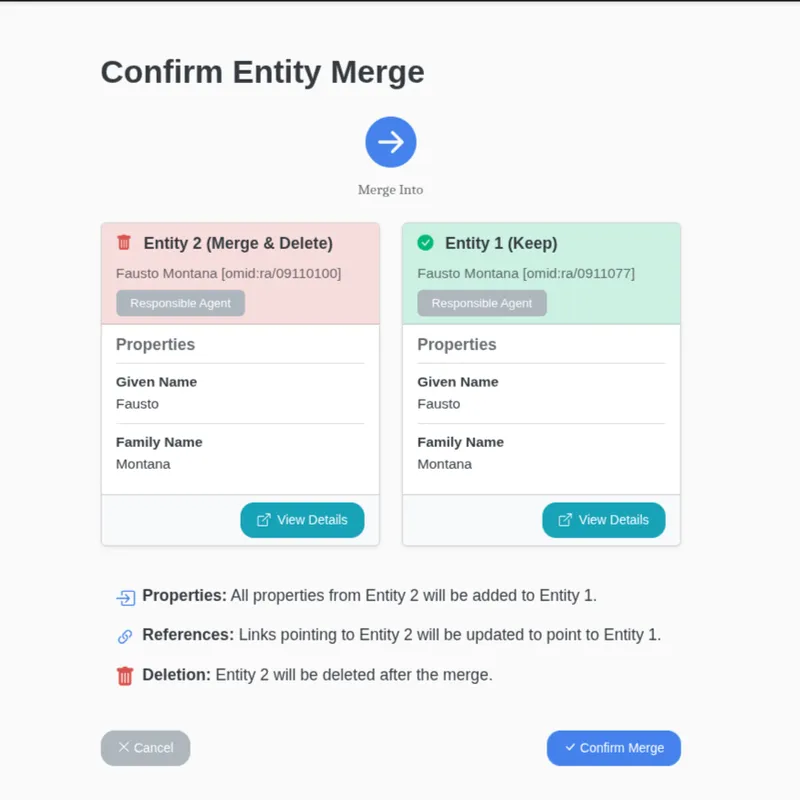
This screen clearly shows:
- Entity 2 (Merge & Delete): The record that will be deleted. This is the entity you selected from the “Similar Resources” list.
- Entity 1 (Keep): The primary record that will be kept and updated. This is the entity whose page you started on.
Below the two boxes, the system explains the rules that will be applied automatically:
- Properties: All properties from Entity 2 will be added to Entity 1.
- References: Any links from other records that point to Entity 2 will be updated to point to Entity 1.
- Deletion: Entity 2 will be deleted after the merge is complete.
Step 3: Complete the merge
Section titled “Step 3: Complete the merge”Click the “Confirm Merge” button to finalize the process. HERITRACE will then perform the actions as described.
This feature is essential for maintaining a high-quality, accurate, and non-redundant collection.